OK, so I have to admit I love, LOVE reading ‘how I do it’ type web entries for the artists I follow, (Frank Quitely, Eric Canete, Art Adams, Gary Erskine etc) and I thought that it’s about time I share how I draw up what I do. Art geeks of the world…get ready!
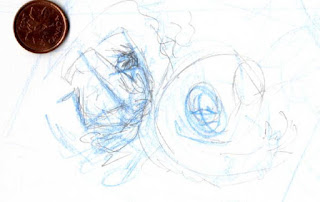
I start with my sketch book and I focus on getting a good line of action. I’m working very loose, very, VERY small, and generally just mucking about for ideas and inspiration. In this case my idea was to try a Wolverine Vs. Venom type battle. I made about 10 very small sketches and the one pictured was the most successful Wolverine one…. It felt like he had energy, and life. Basically, it spoke to me! ;-) To give an idea of how small I work I scanned it with a penny for reference. The other nine sketches get thrown out cuz they were ugly and just not working.

Now I grab a piece of cheap blank printer paper. My focus here is to keep the life and energy from the sketch, make it bigger, figure out a few details, and to make sure that everything will fit on the page. I’d hate to have it ¾ drawn and then have an arm or leg cut off or cropped badly. ( I learned this one the hard way! ) I’m staying very aware of ‘squash and stretch’ at this point in the process. I also decided that I’d need some heavier blacks in the lower left corner to help balance the Venom’s heavy black that I’d be using on the right. In my best teacher type voice: ‘Gotta keep that page looking balanced!’ Somewhere here, I also realized that I’d draw Venom’s head WAY to big, and wrote a note in blue pencil to shrink it and push it forward for more energy. No worries about mistakes though, that’s why this stage is here. The hard part for me is to NOT DRAW THE COOL STUFF, like faces muscles etc. I’m just getting a ‘template’ built that I’m gonna act on in the next (and final) pencil stage.

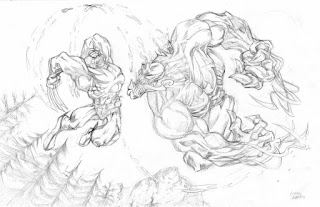
Ahh…the actual drawing! This is my favorite stage. The most bang for the buck! I use the template from the last stage and blow it up to about another 40% larger, so it now fits on an 11x17 sheet . I take a nice piece of Strathmore 500 Bristol and light box in my work from the last step. I’m using non-repro blue pencils here. Then once it’s all down, the rap music gets cranked, and away I go with my trusty mechanical 2H pencil! I’m pretty happy with it at this point. This is where I’d love to have a pro inker to hand this bad boy to…but since I don’t , its up to me to ink it.

Inks are a bit funny for me. I enjoy it, but it just seems to take WAY longer than I think it will. I’ve learned lately to slow down and just enjoy it. Here I’m trying to use and create different textures. The jury is out on how successful I am at this! For most of the figures I’m using India ink and my trusty 102 nib, that’s old and worked in the way I like it. I also use some Microns for minor corrections after my erasing.

Now it’s off to the colorist for the magic to continue.
I hope you liked this post and/or found it helpful. Feel free to LMK. I may do another post like this again sometime!
Cheers,
Gibson

Thanks for this Mr Quarter. I can't draw for toffee but am always interested to see The Process and I'm sure those who know their eraser from their elbow will find a lot more in there to take home - I think one of the important ones is making smaller sketches to get the best angles and composition, I imagine this could lead to a superior finished image (which is certainly what you've got there).
ReplyDeleteThanks for sharing GQ, always a pleasure to see a new 'how I did it' piece, especially from an artist I admire.
ReplyDeleteLove it
ReplyDeleteNice. Always good to see process posts, and this is a corker - just like the picture it's about!
ReplyDeleteYour inks are coming along very nicely. A big difference even in just the last year or two!
ReplyDeleteThe only thing I'd suggest here would be a crisper line on the outer edges of the mountains in the background. They look a little fuzzy. It's a really minor point, though. Everything else looks GREAT!
thanks for your commment. your stuff is great (im practicing my inking...lot of work to do)
ReplyDelete